


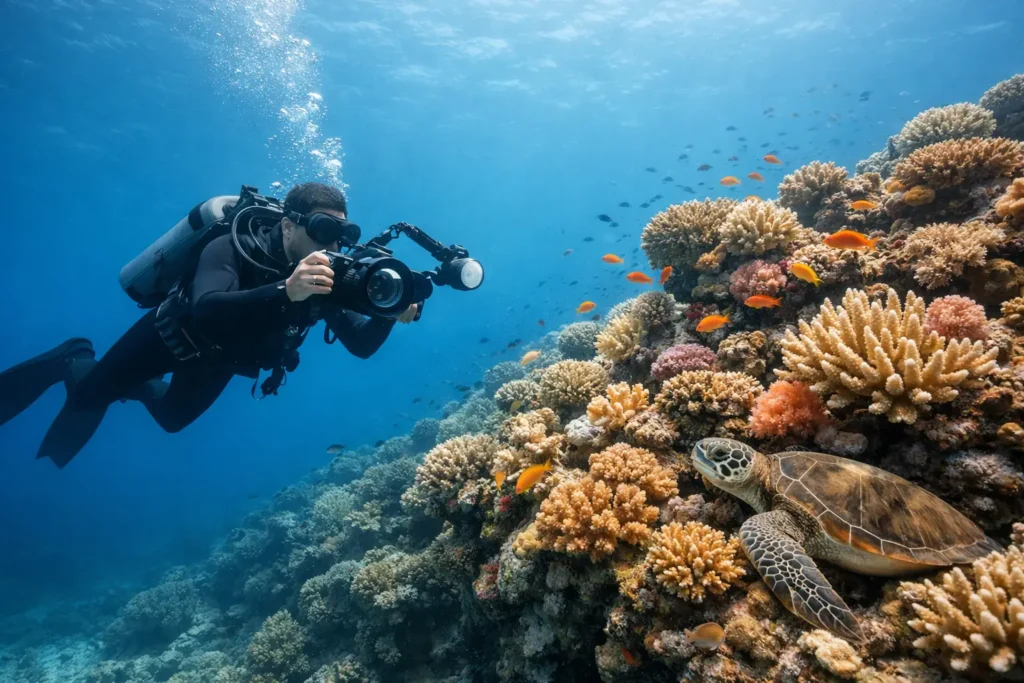
A reef scene can look electric with your own eyes, then strangely flat when you review the photo on the boat. The difference is not just the camera. Learning how to photograph coral reefs means working with changing light, water movement, your own buoyancy, and a living habitat that deserves more than a rushed close-up.
The good news is that great reef photography does not require a suitcase of professional gear. It requires calm positioning, a few deliberate settings, and the patience to let the reef reveal its best moments. Whether you are snorkeling in shallow water or diving along a Caribbean wall, the goal is the same: bring home images that feel alive without disturbing the life in front of your lens.
Start With Control, Not the Camera
The sharpest coral photo begins before you press the shutter. If you are scuba diving, get neutrally buoyant and trim your body so your fins stay well above the reef. A drifting fin tip, dangling pressure gauge, or sudden grab for balance can break coral that has taken decades to grow.
Pause a few feet from your subject before moving closer. Notice the current, where the sun is coming from, and whether a fish is using the coral head as shelter. Then approach slowly, using small breaths and gentle fin movements rather than your hands. Never hold the reef, kneel on the sand beside it, or move marine life for a cleaner frame.
This is where an experienced guide makes a genuine difference, especially for newer divers. In Bayahibe, local guides can point out reef subjects while helping you keep a respectful distance in currents and changing conditions. The best image is never worth contact with the reef.
Choose Gear That Matches Your Dive
A compact camera in a quality underwater housing can produce beautiful vacation photos in clear, shallow water. An action camera is easy to travel with and excellent for wide reef scenes, snorkeling, and video, although it has less control over exposure and close focus. Mirrorless and DSLR systems offer the strongest image quality and flexibility, but they demand more attention underwater and more care on the boat.
For a first reef-focused trip, prioritize a dependable housing, a wrist lanyard, an anti-fog insert, and a camera you already know how to operate. Test every button and seal before entering the water. A tiny hair, grain of sand, or strand of fabric on an O-ring can flood a housing.
A red filter can help at moderate depths when shooting only with ambient light, particularly on action cameras. It is not a replacement for a strobe, though. Filters reduce available light, so they work best in bright conditions and can complicate exposure in darker water.
Use Light to Bring Back Coral Color
Water absorbs color quickly. Reds and oranges begin to fade first, which is why a reef that looks warm and colorful to your eye can turn blue-green in a photograph. In very shallow water, sunlight can be enough. Keep the sun behind you or slightly to one side, shoot downward at a modest angle, and avoid putting your own shadow across the coral.
Below roughly 15 to 20 feet, artificial light becomes more valuable for close subjects. A single strobe or video light can restore color to a coral fan, sponge, or small fish. Position it slightly above and off to the side of the lens, rather than aiming it straight ahead. This reduces backscatter, the white specks created when light hits particles in the water.
For wide reef scenes, strobes have limited reach. Rather than trying to light an entire coral garden, use the available sun creatively. Shoot upward toward the surface to include sun rays, a diver silhouette, or the shape of a sea fan against blue water. Early morning is often especially rewarding because lower-angle light adds texture without the harsh glare of midday.
Camera Settings for Coral Reef Photography
Settings depend on your camera, depth, and light, but a few starting points make the process easier. Use a fast enough shutter speed to compensate for surge and fish movement. Around 1/125 second is a useful beginning for still coral, while 1/200 or faster helps with active fish and a moving photographer.
For close-ups, choose an aperture around f/8 to f/11 if your camera allows it. This gives enough depth of field to keep the coral structure sharp. For wide scenes, f/5.6 to f/8 is often a practical balance between sharpness and available light.
Keep ISO as low as conditions allow, then raise it gradually rather than accepting a blurry image. Many compact cameras and action cameras make these decisions automatically, so focus on exposure compensation instead. If the reef looks washed out in bright, shallow water, lower exposure by one-third or two-thirds of a stop. If your subject is too dark against blue water, move closer when safe to do so or use a light rather than heavily brightening the file later.
How to Photograph Coral Reefs With Better Composition
Coral reefs are visually busy. A frame filled with every color and texture can become confusing fast, so give the viewer one clear reason to look. That might be a bright sponge, a branching coral formation, a sea turtle passing in the distance, or a school of grunts moving above the reef.
Get low when conditions and your buoyancy allow. Shooting at the same level as a coral head, rather than straight down, gives the image depth and places the reef against open blue water. Leave enough room around your main subject to show where it lives. A fish portrait is stronger when a little reef structure tells its story.
Wide-angle shots work beautifully when you are close to a foreground coral feature and can include a diver, surface glow, or blue-water background. For smaller details, switch to a closer perspective and simplify the frame. Look for patterns in brain coral, the curve of a sea fan, or the surprising color contrast between a fish and a sponge.
Do not chase every animal you see. Choose a likely subject, settle into position, and wait. Curious fish frequently return to the same coral head, and calm behavior produces more natural images than a fast pursuit ever will.
Handle Backscatter, Surge, and Visibility
Even clear Caribbean water contains suspended particles. The easiest way to reduce backscatter is to get closer to the subject, use less strobe power, and angle the strobe outward so its beam does not light the water directly in front of the lens. Keep your lens port clean between dives, too. A single water drop can soften an otherwise excellent image.
Surge is common around shallow reefs and can make precision framing difficult. Instead of fighting it, watch the rhythm for a few seconds. Take photos at the brief pause at either end of the movement, and hold your camera close to your body for stability. If you are snorkeling, time your shots between fin kicks and avoid stirring sand with your feet.
Visibility changes throughout a day. After rain, wind, or heavy boat traffic, wide scenes may look less dramatic. That can be the right time to photograph larger coral textures, colorful sponges, and fish portraits at closer range.
Photograph Responsibly Around a Living Reef
A coral reef is not a backdrop. It is a community of animals, plants, and fragile coral colonies responding to every touch, kick, and burst of bubbles. Respectful photography protects the site for the next guests and often leads to better pictures because wildlife behaves more naturally around calm observers.
Keep a safe buffer between yourself and coral, do not feed fish for photos, and never use gloves as permission to touch anything. Avoid crowded subjects when divers are stirring sand or pressing too close to marine life. If a turtle, ray, or fish changes direction to avoid you, give it more space.
On a private or small-group outing, ask your crew where photography works best for the day’s conditions. At Sharky’s Crew, the advantage of local, unhurried guiding is not simply finding a pretty coral head. It is arriving with enough time to settle in, observe the reef, and photograph it without turning the experience into a race.
Practice One Skill Per Dive
Trying to adjust settings, frame a subject, manage buoyancy, and monitor your air all at once can feel like too much. Make each dive a focused practice session. On one dive, concentrate on getting close without touching the reef. On the next, work on side lighting. Then try low-angle compositions or patiently photographing one fish species.
Review images after the dive while the conditions are fresh in your mind. Ask why a frame worked: Was the sun behind you? Did you get lower? Was the water clearer at that depth? Also notice what failed. Blue images, soft edges, and floating particles are useful feedback, not wasted shots.
The reef will not pose on command, and that is part of its magic. Slow down, float steady, and let the scene happen in front of you. The photograph you remember most may be the one you took only after you stopped trying to force it.
